Sunday, December 29, 2019

December pages and a full walk through in my Heidi Swapp Memory Planner

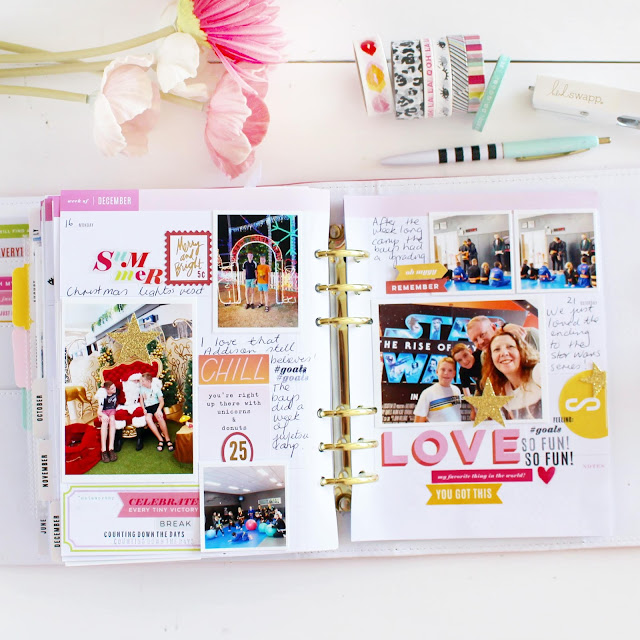
 Welcome to December! I am thrilled to have completed my December pages in my Heidi Swapp Memory Planner. This year I used the classic planner! I am thrilled and grateful to know that my family's memories and stories have been forever captured in my Color Fresh Memory Planner.
Today I want to share my December pages and then a complete walk through video of my whole year.
Heidi Swapp Memory Planner

I love using the Color Fresh sticker booklets to accentuate stories. I love that you can mix and match them and overlap for pops of fun.

Heidi Swapp Memory Planner

Here I added some of the Color Fresh washi tape to serve as separation of journaling and embellishments.

Heidi Swapp Memory Planner

I also used the new Storyline  Magical Sticker booklet to add color and pattern to my pages.

Heidi Swapp Memory Planner

My final week in my 2019 Color Fresh Memory Planner. It combines some of my favourite embellishments and stamps from the Color Fresh collection to sum up my feelings for this project! "This is Happiness"


Check out my complete 2019 walk through above!

Heidi Swapp Memory Planner

Don't you love a full planner. I love all the bits and pieces that make up our lives. Thankfully they are  all safely stored in my Memory Planner forever!

Supplies : Heidi Swapp Color Fresh -Memory Planner Classic Planner, Washi set, Clear Stamps

Photobucket

Thursday, December 26, 2019

"let's eat" with Heidi Swapp Storyline


I am back again sharing a brand new Heidi Swapp Storyline layout. The thing I love the most about the  Storyline collection is how quickly and easily you can create a scrapbook layout. This double page spread took me less than 30 minutes including printing the photos!


I started by printing 4 photos at 3x4 and adhered them to the 11x 8.5 Storyline page. 


I added a slice of pattern paper from the Heidi Swapp Color Fresh collection and then added some stickers from the Color Fresh collection in and around the photos. See how quick that was!


To complete my layout I added a QR code that links to my family and friends singing me Happy Birthday. I really love how quick and easy my layout came together. The fun and easy thing also is that the Storyline and Color Fresh collection are both available at your local JoAnn!

Photobucket

Sunday, December 1, 2019

Planner Organisation


As the year draws to a close and we look towards next year I want to share with you how happy I have been all year with my simple but effective planner organisation. I love working in my
 Heidi Swapp Memory Planners that you can find at JoAnn stores. Over the years I have experimented with a variety of ways to organise my planner stash and over the last few months I have finally come to a happy place. Let me share my secret!

Heidi Swapp Planner Organisation

I found myself a pretty mint basket with handles from local store and I placed all my planner goodies- sticker booklets, pens, washi tape, stencils, scissors, staplers etc inside the basket. 

Heidi Swapp Planner Organisation

The handles allow me to move the basket around my home to wherever I am working on my planner. My sticker booklets and washi are within easy reach as they are what I turn to first!

Heidi Swapp Planner Organisation

I leave my planners and Journals piled up beside my printer for easy access.

Heidi Swapp Planner Organisation

I love how pretty but organised my basket it. Inside the glass box I have my stamps and inks, scissors and stapler. My pens are stashed in the cute pineapple holder and my adhesives in the mint box. It is all within easy access and I can work on my planner any time! 
You can find all the Heidi Swapp Planner goodies at your local JoAnn store

Photobucket

Thursday, October 10, 2019

Travel pages with the Heidi Swapp Color Fresh collection

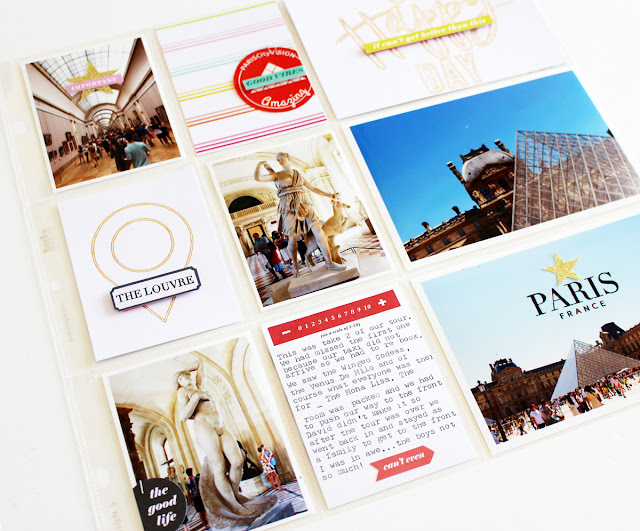
Today I want to share a new travel page from our trip to Europe a few months ago  using the fun Heidi Swapp Color Fresh collection. The bright bold colours and patterns were perfect for our visit to the Lego store in London.


A lot of my travel pages will be using different sizes of pocket pages and I am loving using pattern paper from the Color Fresh collection in the 3x4 pockets.


I added some of the stickers from the  Color Fresh Sticker book to create my eclectic title on a piece of Ephemera. I love the fun pops of colour.


I added one of the gold Puffy Stickers on a vertical angle to one of the photos for a fun effect. This always adds movement throughout a layout.


On the 6x12 pocket page I added more photos and more of the stickers from the Color Fresh collection.  Add.ng some of them with foam tape for extra dimension. I also  love layering them over photos for a unique cohesive feel to the layout.


Using a scrapbooking collection in your pocket pages is easy. Just trim the pattern papers to fit into your pockets and then add sticker  and ephemera  in and around your photos to complete the look! I can't wait to get creating on my next travel pages!


Photobucket

Tuesday, October 8, 2019

his and hers diy tumblers with the Spin It Tumber Turner

I love being able to play with fun and practical tools in my home. Today I want to share how cool the Spin It Tumbler Turner from We R Memory Keepers is to make your own glittered tumblers.
The new Spin It Tumbler Turner and accessories available exclusively at Michaels is able to create custom tumblers both tall and short in any color you want.


I found some aqua colored metal tumblers and wanted to create a 'his and hers' tumbler set. I  grabbed the white and black glitter from the  Spin It collection and sprinkled it on the bottom of the tumblers over a base of craft glue. I then finished off with two layers of the resin following the enclosed instructions carefully. 


I love how the white and black glitter shimmers and shines at the bottom of the tumblers.


The best thing is...it is such an easy process, just mix up the epoxy solution, slip your chosen tumbler on the spin it tool and gently pour on the epoxy smoothing out with a pop stick as it turns.


I love how they turned out so much. I  know exactly what my family and friends will be receiving for Christmas. With the process so quick and easy and the end result so amazing I cannot wait to create more!

Photobucket

Wednesday, October 2, 2019

Happy World Smile Day.


Today is World Smile Day!  A day to spread love, kindness and 'Free Smiles' all day!
I thought I would celebrate at home with my Heidi Swapp Lightbox.
We recently created a small study area in our living room for my oldest. He has started high school and needs a quiet place to study. I wanted to encourage my son to smile so I added the "free smiles' quote on my lightbox as a nod to Free Hugs!

Heidi Swapp Lightbox

I kept the lightbox clean and simple by using the font from the Party Accessory Kit and the one smiley emoji from the Emoji Mega pack.

Heidi Swapp Lightbox

I love that little pop of pink and yellow!

Heidi Swapp Lightbox

The great thing is you can find the lightbox and slides at your local JoAnn store so you can have a fabulous World Smile Day as well!

Photobucket

Saturday, September 28, 2019

Easy cards with Heidi Swapp Winter Wonderland

I love being able to create Holiday cards quickly and easily. I want to share three cards I made using the Heidi Swapp Winter Wonderland  collection- Boxed set of cards, Cardstock stickers and some vellum.


I took three cards from the Boxed set and trimmed about an inch for one side. I then punched some vellum into circles using a 4 inch circle punch. I then layered the vellum circles and stickers from the Winter Wonderland collection to complete my cards quickly and easily.


That reindeer is just the cutest.


I adore the vellum Holly mixed with the felt Holly from the Layered Sticker sheet.


Adding elements with foam dots adds dimension and shadow.


I love the these three cards came together so quickly and easily. I cant wait to create more using the Heidi Swapp Winter Wonderland collection.

Photobucket

Thursday, September 12, 2019

Happy Halloween with DCWV


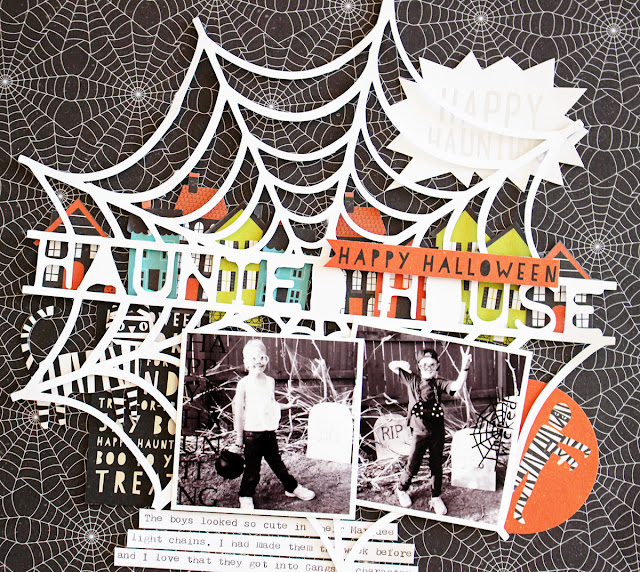
I love this time of the year, all the fun holidays are just around the corner. Halloween is gaining momentum here in Australia so I thought I should catch up on some older Halloween photos before the new ones are taken this year.
Happy Halloween Paper stack from DCWV


I started with the fabulous 12 x 12 Happy Halloween paper stack from DCWV!

It is filled with lots of fun patterns that are bright and bold, just perfect for Halloween!


Happy Halloween Paper stack from DCWV

I then found that cute Haunted House cut file from the Cut Shoppe and proceeded to cut those cute little colourful houses from one of the pattern papers to back the words! I love the way it looks.

Happy Halloween Paper stack from DCWV

I fussy cut other shapes, and words from some of the other die cut pattern papers from the 12 x 12 paper stack and tucked them in and around the layout. It goes to show all you need is a few pattern papers and a scrapbook page can be completed.
I cant wait for this years Halloween, I will have the perfect papers just waiting to be used on my layouts!

Photobucket

Wednesday, September 4, 2019

Foil Quill and travel pages

If you know me, you know I love all things that shimmer and shine! Well I am so excited to be playing with the We R Memory Keepers Foil Quill, it is just so fun but more importantly so easy to use...

WRMK Foil Quill

... and team the Foil Quill with the Heidi Swapp USB Designer Drive, which holds 200 Heidi svg and png files- like the ones I used on this project- Love this, Oh Happy Day, the Geotag and Camera and you have got yourself one amazing crafty tool!


Today I want to share two ways I have used the Foil Quill and Heidi Swapp Designer Drive!

WRMK Foil Quill

Firstly I used the Foil Quill and Gold Foil Quill foil to create my own cards for my pocket page spread. It was so easy, I simply placed some white cardstock down on my die cutting machine, overlaid it with the Gold Foil Quill foil and ran it through my cutting machine. once the cutting machine had worked its magic I  trimmed the cardstock to fit into my pockets. 

WRMK Foil Quill

WRMK Foil Quill

I then used the "Love this" PNG file in my die cutting machine,  I used the Trace feature to turn the image into a cutfile and cut it on some white cardstock. I then layered it over the top of my plastic sleeve to create the title of my layout. 

WRMK Foil Quill

I then embellished the rest of my layout using some Heidi Swapp Color Fresh Ephemera and stickers.

WRMK Foil Quill

I added some fun interactive elements. 

WRMK Foil Quill

WRMK Foil Quill


WRMK Foil Quill

and lots of dimensional adhesive for some simple layering techniques. 

WRMK Foil Quill

Doesn't the foil look incredible on this 3 x 4 card!

WRMK Foil Quill

I cant wait to use the Foil Quill again. It is going to become a staple in my scrapbooking tool kit!


Photobucket