Saturday, September 28, 2019

Easy cards with Heidi Swapp Winter Wonderland

I love being able to create Holiday cards quickly and easily. I want to share three cards I made using the Heidi Swapp Winter Wonderland  collection- Boxed set of cards, Cardstock stickers and some vellum.


I took three cards from the Boxed set and trimmed about an inch for one side. I then punched some vellum into circles using a 4 inch circle punch. I then layered the vellum circles and stickers from the Winter Wonderland collection to complete my cards quickly and easily.


That reindeer is just the cutest.


I adore the vellum Holly mixed with the felt Holly from the Layered Sticker sheet.


Adding elements with foam dots adds dimension and shadow.


I love the these three cards came together so quickly and easily. I cant wait to create more using the Heidi Swapp Winter Wonderland collection.

Photobucket

Thursday, September 12, 2019

Happy Halloween with DCWV


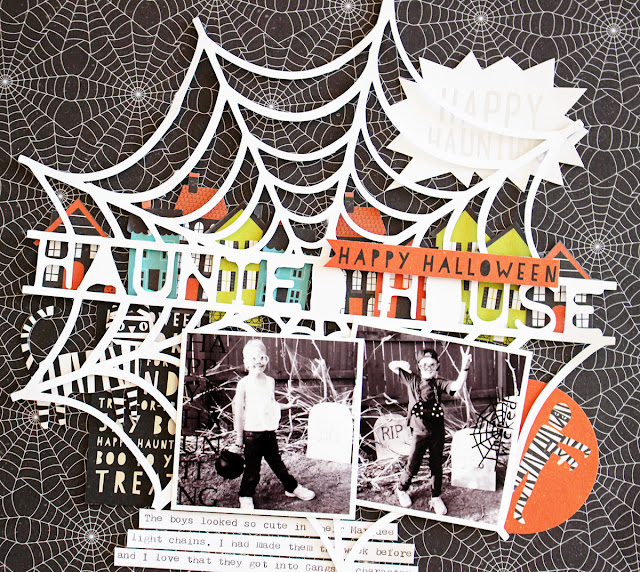
I love this time of the year, all the fun holidays are just around the corner. Halloween is gaining momentum here in Australia so I thought I should catch up on some older Halloween photos before the new ones are taken this year.
Happy Halloween Paper stack from DCWV


I started with the fabulous 12 x 12 Happy Halloween paper stack from DCWV!

It is filled with lots of fun patterns that are bright and bold, just perfect for Halloween!


Happy Halloween Paper stack from DCWV

I then found that cute Haunted House cut file from the Cut Shoppe and proceeded to cut those cute little colourful houses from one of the pattern papers to back the words! I love the way it looks.

Happy Halloween Paper stack from DCWV

I fussy cut other shapes, and words from some of the other die cut pattern papers from the 12 x 12 paper stack and tucked them in and around the layout. It goes to show all you need is a few pattern papers and a scrapbook page can be completed.
I cant wait for this years Halloween, I will have the perfect papers just waiting to be used on my layouts!

Photobucket

Wednesday, September 4, 2019

Foil Quill and travel pages

If you know me, you know I love all things that shimmer and shine! Well I am so excited to be playing with the We R Memory Keepers Foil Quill, it is just so fun but more importantly so easy to use...

WRMK Foil Quill

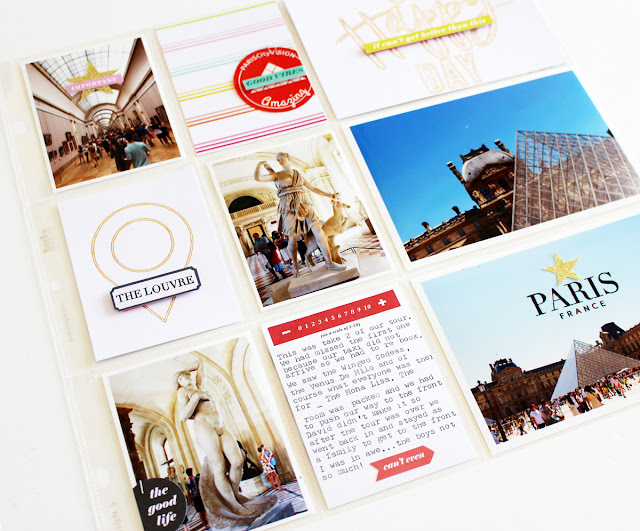
... and team the Foil Quill with the Heidi Swapp USB Designer Drive, which holds 200 Heidi svg and png files- like the ones I used on this project- Love this, Oh Happy Day, the Geotag and Camera and you have got yourself one amazing crafty tool!


Today I want to share two ways I have used the Foil Quill and Heidi Swapp Designer Drive!

WRMK Foil Quill

Firstly I used the Foil Quill and Gold Foil Quill foil to create my own cards for my pocket page spread. It was so easy, I simply placed some white cardstock down on my die cutting machine, overlaid it with the Gold Foil Quill foil and ran it through my cutting machine. once the cutting machine had worked its magic I  trimmed the cardstock to fit into my pockets. 

WRMK Foil Quill

WRMK Foil Quill

I then used the "Love this" PNG file in my die cutting machine,  I used the Trace feature to turn the image into a cutfile and cut it on some white cardstock. I then layered it over the top of my plastic sleeve to create the title of my layout. 

WRMK Foil Quill

I then embellished the rest of my layout using some Heidi Swapp Color Fresh Ephemera and stickers.

WRMK Foil Quill

I added some fun interactive elements. 

WRMK Foil Quill

WRMK Foil Quill


WRMK Foil Quill

and lots of dimensional adhesive for some simple layering techniques. 

WRMK Foil Quill

Doesn't the foil look incredible on this 3 x 4 card!

WRMK Foil Quill

I cant wait to use the Foil Quill again. It is going to become a staple in my scrapbooking tool kit!


Photobucket