Thursday, April 27, 2017

Magnolia Jane Wedding Album

My husband and I were married just over 12 years ago. I must admit in that time i have created several scrapbook layouts about our wedding but never put together an album before. Recently I came across some excess photos from our professional photographer- proofs that were used so that we could choose our album photos. These photos were all beautiful photos and large enough to use in an album. So I thought now was the time!  I grabbed my Heidi Swapp Magnolia Jane Floral Photo Journal that to me is the perfect wedding album, some of the Magnolia Jane collection embellishments, found at your local JoAnn store, some adhesive and a few pieces of ribbon and got creating! To add ribbon to my front and back covers I adhered with double sided tape two ends of white satin ribbon to the inside front and back covers. I then trimmed some of the Marble pattern paper which is the same as the inside covers to the same size of the cover and adhered it over the ribbon to hide the adhesive. You would never know that the ribbon was not always there.

  Kim Jeffress for Heidi Swapp Magnolia Jane albumThe ribbon adds such a  pretty touch to my album.

  Kim Jeffress for Heidi Swapp Magnolia Jane album

The photo journal holds 25 photos! There are 3 shaped photo windows throughout the book. Each shape- rectangle, circle and square window are on 2 consecutive page. Then it moves to the new shape and repeats throughout the book. I love the eclectic feel this gives to my album.

  Kim Jeffress for Heidi Swapp Magnolia Jane album

I slipped my photo into the window then secured it with some of the Marble wash tape from the collection. I attached another photo with one of the Magnolia Jane clips and added the Gold Foil word with the clip too.

  Kim Jeffress for Heidi Swapp Magnolia Jane album

The photo lifts up to reveal journaling underneath.

  Kim Jeffress for Heidi Swapp Magnolia Jane album

I added another of the Gold Foil words on the next page to accentuate the round photo and added some small strips of washi to the edge of the page.

  Kim Jeffress for Heidi Swapp Magnolia Jane album

On the left I backed my photo with pattern paper and then attached it with washi tape to serve as a flap!

  Kim Jeffress for Heidi Swapp Magnolia Jane album

The photo lifts to reveal more journalling!

  Kim Jeffress for Heidi Swapp Magnolia Jane album

I added that pretty little acrylic flower from the Ephemera pack with a pink clip and embellished the page with strips of washi.

  Kim Jeffress for Heidi Swapp Magnolia Jane album

For my next page I added some stamping using my vintage Heidi stamps then added some of the clear stickers that come with the photo journal to a further embellish my pages.

  Kim Jeffress for Heidi Swapp Magnolia Jane album

On the left page I used the floral stamp from the Only You stamp set from the Magnolia Jane collection then used one of the stamps from the Special stamp set to add further words. I adhered one of the Notebook Envelopes to the page and added in some punched hearts.

  Kim Jeffress for Heidi Swapp Magnolia Jane album

The envelope lifts up to reveal my journalling!

  Kim Jeffress for Heidi Swapp Magnolia Jane album

I added my favourite portrait photos across this double page and embellished simply with the clear stickers.

  Kim Jeffress for Heidi Swapp Magnolia Jane album

I added some stamping and washi strips to enhance my journalling!

  Kim Jeffress for Heidi Swapp Magnolia Jane album

I used some of the Gold Glitter Letters in an arch under my photo to draw attention to it!

  Kim Jeffress for Heidi Swapp Magnolia Jane album

I love that I can create a masculine feel using these washi patterns as well as a touch of stamping and stickers!

Kim Jeffress for Heidi Swapp Magnolia Jane album

For this page I adhered my photo on the right side and slipped a piece of pattern paper from the collection into the photo window!

  Kim Jeffress for Heidi Swapp Magnolia Jane album

Here I added some elements from the 2017 Memory Planner collection to make my photo pop!

  Kim Jeffress for Heidi Swapp Magnolia Jane album

I adhered another of the clear Acrylic pieces to the left page over my photo using one of the gold clips.

  Kim Jeffress for Heidi Swapp Magnolia Jane album

I used one of the stickers and placed it directly over my journaling, it is sheer so you can still read the journalling and I added some more glitter stickers to complete the page!

  Kim Jeffress for Heidi Swapp Magnolia Jane album

More of the Gold Glitter letter stickers in an arch accentuated with one of the Clear Acrylic pieces from the ephemera pack create a pretty border around my photo.

  Kim Jeffress for Heidi Swapp Magnolia Jane album

Again I repeated the Gold Letter stickers to embellish the circular photo and added one of the kraft diecuts from the Ephemera pack to complete the page.

  Kim Jeffress for Heidi Swapp Magnolia Jane album

I also created my own tab by threading and tying some mint satin ribbon onto a paper clip and adding it to my page.

  Kim Jeffress for Heidi Swapp Magnolia Jane album

Stickers and washi!

  Kim Jeffress for Heidi Swapp Magnolia Jane album

The Marble patterned Washi really creates a sophisticated look.

  Kim Jeffress for Heidi Swapp Magnolia Jane album

Another of the Gold Foil Words add a beautiful touch to a page.

  Kim Jeffress for Heidi Swapp Magnolia Jane album

I overlapped one of the heart Notepads from the 2017 Memory Planner collection over my photo for a quick embellishment.

  Kim Jeffress for Heidi Swapp Magnolia Jane album

A jumble of stickers, writing, and Washi in a cluster provide a sophisticated embroider to the right page.

  Kim Jeffress for Heidi Swapp Magnolia Jane album

Again my journalling is top and tailed by stamping and layered stickers seamlessly.

  Kim Jeffress for Heidi Swapp Magnolia Jane album

My final page I embellished simply with some of the clear sticker. I really wanted this photo to shine.

  Kim Jeffress for Heidi Swapp Magnolia Jane album I love the way my journal turned out. My boys and husband have all loved looking through it which of course is the reason why we do this. I love that I now have all my photos and memories in one place! I know this is one of my albums that I will treasure in years to come!

  Save

Thursday, April 13, 2017

Celebrate Easter with Heidi Swapp storyline

I love that my boys still believe! I love that they still wake up on Easter morning and go hunting for eggs. I know way too soon they are going to be past this stage but I am hanging on to these times for as long as I can. I also love that I am able to retell over and over these stories because of my memory keeping, and I love even more now that it is just so easy with the new  Heidi Swapp Storyline collection available at Michaels. Let me share a little back story to this layout. This time last year I spent Easter with my dear media team member Jamie Pate, away from my family who were back home in Brisbane Australia. Lucky for me my husband sent me these photos of my boys egg hunting  via text messages on my phone. A half a world away, don't you love technology?! There the photos sat, on my phone  for almost 12 months because quite frankly I just didn't have the time to scrap them. Enter the new Storyline collection. When I saw that each Sticker pack contained a sheet of "Holiday" words I knew I could get this story told pronto! Let me share with you this layout I created from last years Easter that took me less than half an hour to put together!

  Kim Jeffress for Heidi Swapp Storyline collection

I just love how quick and easy it is to get a memory scrapped. I added some stitching which took me an extra 4 minutes and that die cut bow, another 2 minutes, so adding simple extra touches like this adds hardly any time to getting a page done, and I think for special occasions such as Easter sometimes a touch of extra makes all the difference.

  Kim Jeffress for Heidi Swapp Storyline collection

The Deck of Days cards make it so easy to embellish a page. Just peel of the backing and stick the card down!

  Kim Jeffress for Heidi Swapp Storyline collection

I love the soft subtle texture the stitching and bow creates! They both create texture without the bulk which for me who creates a lot of scrapbook layouts is important! Lets see how easy it was to create my page. Step 1. Download and print off an egg clipart from google. Lay the print out over the white page that has been removed from the plastic sleeve and trace over the egg outline with a pencil to create an indentation of the egg on the white page underneath.

Kim Jeffress for Heidi Swapp Storyline collection

Step 2. Type out your "who, what and where" using the We R Memory Keepers typecast Typewriter or simply add them in with your handwriting.

  Kim Jeffress for Heidi Swapp Storyline collection

Step 3. Stitch over the egg shape indentation with a sewing machine or you could hand stitch as well. I went around my egg three times for some fun texture.

  Kim Jeffress for Heidi Swapp Storyline collection

Step 4. Gather your photos and Deck Of Days cards to coordinate. I chose the "Little Moments" pack for this layout.

  Kim Jeffress for Heidi Swapp Storyline collection

Step 5. Lay out your photos and cards around the outside of the base card until you find the right balance. Once you are happy with the placement, adhere everything down, adding the adhesive photo corners to adhere your photos. I added some pop dots to some of the photos and cards to add some definition to my page.

  Kim Jeffress for Heidi Swapp Storyline collection

Step 6. Add the date using the date sheet from the Storyline Sticker Kit, I chose the Peony Kit for my layout.

  Kim Jeffress for Heidi Swapp Storyline collection

Step 7. Using the Holiday sheet also found in the Sticker Kit, add your title. I chose the Easter sticker of course.

  Kim Jeffress for Heidi Swapp Storyline collection

Step 8. Write out your journaling using one (or more if needed) of the journaling stickers from Sticker Kit. Peel off and adhere to the layout.

  Kim Jeffress for Heidi Swapp Storyline collection

Step 9. Accentuate some photos with the clear stickers found in the Sticker Kit.

  Kim Jeffress for Heidi Swapp Storyline collection

Step 10. Using a bow die, cut out a white bow and fold as per instructions. I used the We R Memory Keepers One Piece Bow.

  Kim Jeffress for Heidi Swapp Storyline collection


Step 11. To complete the layout adhere the bow to the center of the egg! Kim Jeffress for Heidi Swapp Storyline collection Don't you love how easy this is! As I said previously this layout took me less than 30 minutes, as a busy mum I just love that! Now before you go, let me share with you my scrap table at  the end of my session. I am notorious for being a messy scrapper, I've been known to move to the floor to finish off a project as there is no room left on my desk!!!! However with the new Storyline collection, everything you need is in those two packs- the Deck Of Days and the Sticker Pack. No need to go hunting through your boxes of embellishments, no need to spend hours agonizing over the colour of a button or letter sticker, everything is coordinated ! Everything is there! No mess! No Fuss! 
Kim Jeffress for Heidi Swapp Storyline collection
Photobucket
Save

Thursday, April 6, 2017

Celebrate No Housework day with the Heidi Swapp Letterboard!

Today Is International NO HOUSEWORK DAY!!! Can I get a YAY!!
What better way to celebrate and shout it out to the world ( and my family -wink) than to use the brand new Heidi Swapp Letterboard! It is just so easy to customise any quote , saying or message you have with the different fonts which includes 4 colours, 4 sizes and the best of all words in Heidi's handwriting!
Here I combined black, gold and hot pink letters and icons to tell my story! I love how they pop off the white Letterboard background. Here I am using the Large Letterboard!

Kim Jeffress for Heidi Swapp Letterboard

A close up of the letters, I love all the different fonts mixed together.


Kim Jeffress for Heidi Swapp Letterboard

What would your Letterboard say?
Photobucket

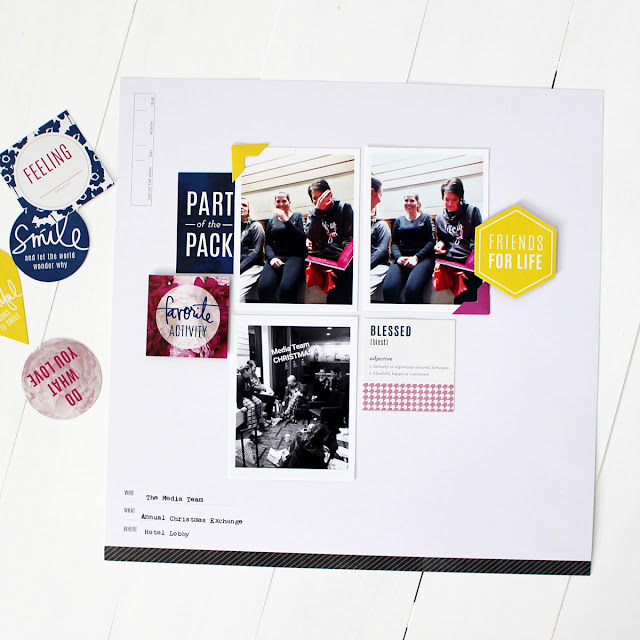
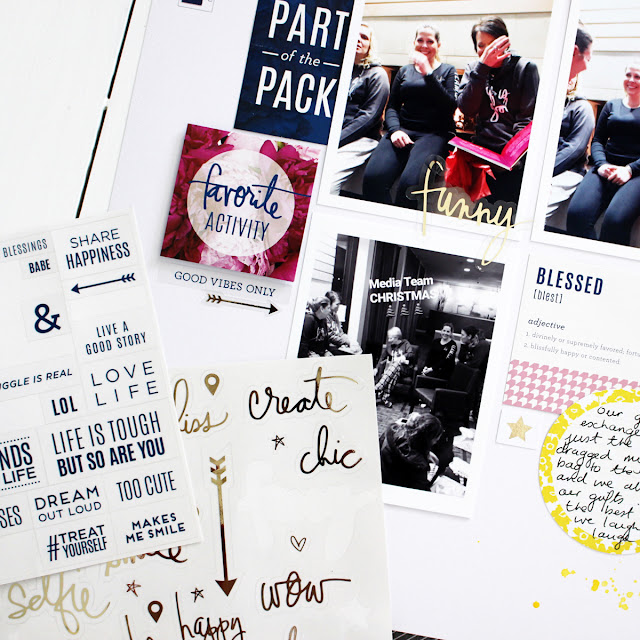
Heidi Swapp Storyline

Have you seen the brand new Heidi Swapp Storyline collection available exclusive to Michaels!
It really is changing the way to memory keep. I love that I can get my family's stories recorded so quickly and effortlessly.  It is quick, it is easy and most important it allowing me to get more memories told!
 I love that the Motivation Deck of Days perfectly matched the new Jot magazine mood board too!


Kim Jeffress for Heidi Swapp Storyline collection

Let me show you how easy it is to create a page!


 1. Gather your photos, Deck of Days cards, Co-ordinating Sticker kit and page from the album

Kim Jeffress for Heidi Swapp Storyline collection

 2.  To begin add your answers to the question- Who Where and What with a Typewriter or you could also hand journal as well.

Kim Jeffress for Heidi Swapp Storyline collection

3. Adhere your photos using the adhesive photo corners from the Sticker Kit.

Kim Jeffress for Heidi Swapp Storyline collection

4. Add cards form the Deck Of Days pack to embellish your page.

Kim Jeffress for Heidi Swapp Storyline collection

 5. Add the date using the stickers from the Sticker Kit.
Kim Jeffress for Heidi Swapp Storyline collection


 6. Add a title from the Holidays sticker Sheet.

Kim Jeffress for Heidi Swapp Storyline collection

7. Add your journaling on the journaling spots and adhere to your page.

Kim Jeffress for Heidi Swapp Storyline collection

 8. Add a few drops of Colorshine to add a touch of colour.

Kim Jeffress for Heidi Swapp Storyline collection


9. Complete your page with word stickers from the Sticker Kit.

Kim Jeffress for Heidi Swapp Storyline collection

Don't you love how easy this is. I am definitely in love with this new( or is it old) way of scrapping. It definitely is all about the photos and stories.
Photobucket