There's a beautiful new mood board over at JOT magazine. I love the soft pastel colours combined with the woodgrain.
I wanted to share my sample for the mood board. I loved the woodgrain so much I wanted to make it a focus of my layout without over it being too over powering. I have used the new Heidi Swapp woodgrain 2 inch tape as a border at the top of my layout and elements from the Heidi Swapp Prismatic project life kit to complete my layout.
I hope you get a chance to play along with the mood board.
I love the simplicity of celebrating the small moments in my family's life using my Memory Planner. Im sharing the last two weeks of my Gold and White spot Memory planner with you today and you will see it is full of our everyday moments both big and small.
On my first page I share a memory that Facebook shared with me from 7 years ago of my youngest son when he was a baby. I added some journaling and then added some of the large stickers from the memory planner collection and my old faithful clear stamps from the Hello Today collection.
I love adding my art work into my planner, they spend so much time drawing I want to capture right now where they are at skill wise as well as their interests. I added some of the white stickers from the Sticker collection straight onto the drawing. A quick and easy embellishment.
I used my planner hole punch to add the holes so I could slip it easily into my planner.
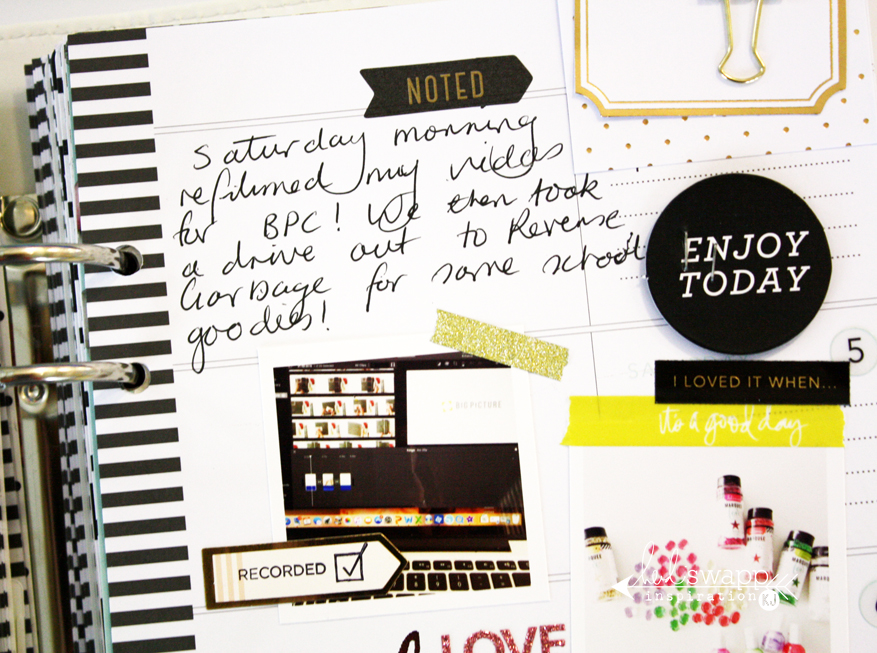
Then I added a small photo to my page and filled the rest with simple journaling about our week. I am also enjoying using quotes that speak to me in my planner, it adds that personal touch.
I am never confident about using my handwriting in my planner but this year I have decided I just need to go with it. So you can see below I added the quote using my handwriting and drew a simple line around to embellish. To add a bit of fun to my page I used some of the washi from the collection pack to hold down my photo.
March starts with a glorious bang with the stunning gold foil divider page.
For my March dashboard I wanted to celebrate my anniversary which falls in March. I added some simple journaling, a wood veneer word and some pink glitter stickers from the collection.
My first double page spread reveals one of the clear divider pages that adds such a pretty feel to my planner.
On the left I added some personal journaling and then my favorite photo from that week. I embellished the photo with some of the brand new washi from the Washi Tape collection.
Makes me happy.
I love the clear overlay over my photo, it adds such a magical touch.
The photo of my new Wall gallery is certainly a memory I want to remember.
I used one of the 4 inch pockets to add in extra photos. I also laid one of the black and gold word strips from the collection directly onto the pocket for easy embellishment.
Another photo holding an everyday memory.
This might be my favorite page in my planner so far. I have used some of the brand new Minc Reactive Art Screen Ink to add that foiled thankyou to my page. It is a real game changer that we can foil any pre designed product, add some of the Reactive Art screen ink and run it through the Minc to add a touch of shine!
Here I have used more of the new Washi tape to add layers but also hold down my photos. Pretty and practical at the same time.
Can you see the gorgeous Rose pink foil, it is just stunning. I added small embellishments around the foiled words to create a focal point on the page.
Let me share a quick video tutorial of how quick and easy it is to achieve this gorgeous result.
Isn't that just incredible. The possibilities are endless with these new Foil Reactive mediums. I cannot wait to add more foil elements into my planner!
Supplies
Gold and White spot Memory planner, Stickers, Gold clip, sheer stickers, Washi Tape pack, Minc machine, Rose Pink Reactive foil, Minc Reactive Foil Art screen Ink, Thankyou Art Screen,Word Stickers, Wood Veneer word
I am so in love with my new Heidi Swapp gallery wall in my scrap studio and I wanted to share a quick video on how I created my clear frame inlay that sits perfectly in the large decorative frame. The gallery wall collection will be at your local Michaels stores any day now so be on the look out soon.
I love the pop of hot pick against the clear then matched with the Mint striped mat.
The new texture paste adds some subtle texture and height to a project without the bulk.
Enjoy my video as I share how quick and easy it is for you to achieve this effect as well!
Sometimes the simplicity of Memory Keeping is photos, journaling and simple pattern papers and embellishments. I love getting back to basics every now and then and today I want to share a layout I created recently.
This layout uses the yummy pattern paper from the Heidi Swapp Memory Planner collection as my base.
I then layered on some of the Heidi Swapp washi tape into strips to form a background layer for my photos. I added in strips from the Silver and Pink washi tape packs. I added in a few sticker embellishments also from the Memory Planner collection.
To complete my layout I added that acrylic handwritten word and silver glitter bow which adds the perfect finishing touch to my layout. I adore the subtle layers it creates.
Have you heard ? Heidi Swapp will be releasing a brand new and way over the top incredible Home Decor Gallery Wall collection exclusive to Micheal's in the coming weeks. I am so honoured to share some of the pieces with you today and share how I restyled one of the walls in my craft studio. Lets start with the over all picture of my new shelving area. Isn't it just the prettiest.
Let's take a closer look at some of the pieces in the collection. Sitting on my white cupboard is the small white frame with the polka dot mat the can be DIYed with Colorshine to suit the colours and decor of your room.
I have sprayed it with the new hot pink Colorshine and I just adore how it really pops. I did spray over the top of the pink with the new clear Colorshine to tone it down a touch and add that extra bit of glimmer. The frames are so light weight they can be placed anywhere. I placed a favourite family photo inside the mat then displayed it on a vintage stand from my stash.
Beside my frame I added some personal elements but also added in that "the best is yet to come" print from the Gallery Wall Art collection. I have displayed it in my vintage flower frog. It will be easy to change out to another of the cards in the collection when I need some new inspiration.
The bottom hanging shelf holds that stunning wooden arrow that I glittered to an inch of its life with the new Mint Colorshine, isn't that colour just delish!!!
Leaning on the back wall is that white metal wall plaque that is magnetic. I added in another Gallery Print and a large banner that I trimmed from the new 12 inch paper pad from the Gallery Wall Art collection. I attached it to the metal plaque with that yummy scrummy mint bulldog clip, it's one of my favourite pieces in the whole collection. To the right of the plaque I have placed some of the brand new 1 and 2 inch washi tape from the collection inside my apothecary jar. I love that it is pretty and functional at the same time.
To the left of my wooden arrow is some of the brand new mediums in the collection. Mint and Hot Pink Colorshine, Glitter and texture paste.
On the top shelf sits the large white frame from the collection, Ilove the fancy design which adds a touch of elegance to my decor. The mat has been customised with some Mint colorshine. Inside the frame I have used one of the brand new 11 inch stencils with the hot pink texture paste, layering it over some sturdy clear acetate. Once it was dry I trimmed it and adhered it to the back of the mat.
Beside the frame is one of the funkier pieces in the collection. The faux pallet board.
These come in two sizes, this one being the smaller size and they are made from paper but look like pallet board and can be totally decorated to match your decor. I have whitewashed mine with the new White Distress paint Kit. I then added some flowers from my stash wrapped in twine to complete.
I just adore this view looking down, so fresh and inviting.
Let me share one last view of my new shelving area. It is definitely my most favourite place not only in my craft studio but also my home. The pretty but bold colours and patterns against the white backdrop of my walls and shelving create a stunning impact.
Be on the look out for this incredible new Gallery Wall collection from Heidi Swapp at your nearest Micheal's soon.
I love when I can use my craft supplies for home decor pieces. Recently I rearranged my studio to find a place for my Heidi Swapp planners and supplies. I wanted to add a little "somethin somethin" to step it up a bit and then I had light bulb moment to use one of the Heidi Swapp Mini Spring Marquee Love shapes as a light up book end.
It's the perfect finishing touch to my planner area. I began with the Mini Hashtag shape and added some of that pretty woodgrain and floral pattern paper from the 8 x8 Paper pad inside the hashtag.
To coordinate with the gold in my planner I added some of the vintage gold glitter 2 inch tape around the outside edge of the hashtag. I then finished off my book end with those darling pink facetted bulbs from the Marquee Love Spring collection. It looks so pretty all lit up at night in my studio.
A quick day time shot and it looks just as pretty.
The vintage gold tape against the soft pink bulbs adds such a pretty touch to my planner area.
Be on the look out for the Spring collection at your nearest Michaels store.