Monday, May 11, 2020

DIY Heidi Swapp Door mats.

Have you seen the new Heidi Swapp Door mats! I love that you can create fun and personalised DIY door mats that suit your decor, theme or purpose. Today I want to share 2 ways  I am using them around my home. The best part is you can grab all the materials needed at your local and independent scrap store.
                                 Idea no 1. The front door mat. I guess you can see my idea and theme here right!

Heidi Swapp DIY Doormats

I began with the Natural Fiber door mat, the Hello/ Goodbye stencil and the Numbers stencil set. I masked off the hello section and used some of the Heidi Swapp outdoor paint in black to stencil on the goodbye. Once dry I went in with the numbers 2020 from the Numbers stencil set.


Heidi Swapp DIY Doormats

I then layered it over the black and white layering mat also from Heidi Swapp.


Heidi Swapp DIY Doormats

I love the look at my front door. The black painted words pop against the black and white layering mat.
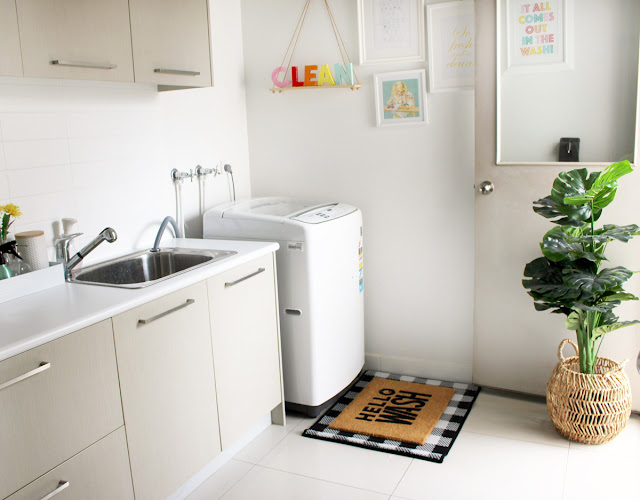
Idea no 2. Laundry mat.

Heidi Swapp DIY Doormats

This time I started with the Natural Fiber door mat, the Hello/Goodbye stencil and the Alphabet stencils. These allow you to custom create any word you want. I masked off the goodbye word and stencilled in the hello word. Once dry I then added in the word Wash with the individual letter stencils again using the black paint.
 Once dry and to complete  my look I layered it over the black and white layering mat in front of my washing machine.


Heidi Swapp DIY Doormats

It  really makes a fun addition to my laundry. 
You can find the Heidi Swapp  stencils, paint, and mats at independent and online stores now! It's the perfect time to create your own DIY doormats!


Photobucket

Tuesday, May 5, 2020

Heidi Swapp Art Walk + using QR codes in your memory keeping


Hello, I am back with a new travel layout for you today. When we visited Rome last year we took our boys to a Gladiator school where they learned the tricks of the trade of fighting like a gladiator. The feel of the photos was rustic so the Heidi Swapp Art Walk collection was the perfect collection to use with my photos.
I wanted to add in some of the videos that I took of my boys when they were training so I used my QR code APP to create my codes. It is one of my go to techniques in my Memory Keeping. I have an easy 'how to' video for creating QR codes for your memory keeping too.

Heidi Swapp Art Walk + using QR codes in your memory keeping

You can see I used the stunning rustic feeling pattern papers from the Heidi Swapp Art Walk collection to fill the 3x4 pockets.

Heidi Swapp Art Walk + using QR codes in your memory keeping

I used the embossed tags to hold my sub title using those black alpha stickers. I also created my title using the Thickers from the collection and added a bit of charm to them by swiping over them with grey ink and one of the Art Walk clear text stamps.

Heidi Swapp Art Walk + using QR codes in your memory keeping

I added my journaling to another piece of Heidi Swapp Art Walk pattern paper using my typewriter. It is so easy to do. I then printed off my QR codes and then adhered them to the pattern paper. I added in foam tape to 2 of them to create dimension.
Watch the video below to see how easy it is to add QR codes into your scrapbooking!


Photobucket