Wednesday, January 6, 2016

JOY

It's been a while since I shared a layout here on my blog, and today I want to share my last layout I created in 2015. I made it on the 31st so I managed to just squeeze it in in time.
I love this layout as it shares the memory of my birthday a few months ago with a great group of friends. I also love it because I got to use the brand new Heidi Swapp Marquee Love Washi tape as the base of my layout, I just adore the colours don't you!
I also love it because It uses those fabulous Mincable letters that I foiled in silver, It gives a very classy feel to my layout.

I love how large these letters are and that you can layer  words such as the Wood Veneer words and the  Mincable pieces over the top.


I love how that cute bow creates a gift out of my photo!


The Minc really still is such a game changer for me! I love using it on every project that I can.


Photobucket

Monday, January 4, 2016

Heidi Swapp Lightbox

Have you seen the brand new Heidi Swapp Lightboxes that are available at independent or online stores! They really are the most fun and can be changed up so easily to coordinate with your decor or holiday or celebration. At the moment I have it in my kitchen and it makes the perfect addition to my Kitchen decor! Heidi has designed not only a number of different fonts but also there are super fun images in all different themes that can be coordinated with your message as well!

@kimjeffress @heidiswapp #hslightbox #hsmarqueelove

You can also see there is an extra slide that can  be placed in either of the three sections to add in smaller letters and make your message longer. How cool is that!

@kimjeffress @heidiswapp #hslightbox #hsmarqueelove

 Day or night it really is the most fun to play with!

@kimjeffress @heidiswapp #hslightbox #hsmarqueelove

                                                                   Thanks for popping by!

Photobucket

Friday, January 1, 2016

Spring Marquee Love Mini Album

Sometimes you gotta think out of the box right! Heidi Swapp has a brand new Spring Marquee Love collection which includes these darling Mini Marquee shapes, new washi tapes and a paper pad collection. It really is the most prettiest collection ever.
I wanted to try something a little different with the shapes so I decided to make a mini book with the heart serving as a cover for the album!


I covered the outside of the heart shape with the new wood Veneer Washi tape and the inside with that gorgeous floral pattern paper....and do you spy those darling facetted bulbs, they are the prettiest pink you have ever seen.


Once my pages where in the album I tied it all together with a big yellow bow!


I began by printing out a quote I found on Pinterest onto some vellum then used the heart template from the box to trace around the heart.


An enlarged photo traced with the heart template.


I added a title page by mixing up some fun fonts and wood veneer.


Here I attached my photo with some of the Mint glitter washi !


The photo lifts to reveal my journaling.


Here I layered pattern paper from the paper pad under my photo. I wanted my album to be a bit eclectic so this page was cut into a circle with my Fiskars circle cutter!


More fun layering.


I created this heart pocket but trimming out the heart template twice  then cutting off the top part of the second piece of paper and then stitching it to the bottom heart. I added that sequin ribbon for a touch of fun.


 Simple embellishment with a chipboard word.


Vellum heart with a sheer sticker.


The wood grain pattern paper  might be a new fav! Here it is cut into another circle.


Floral pattern paper mixed with raw wood veneer!


I also love to layer the wood veneer over photos!


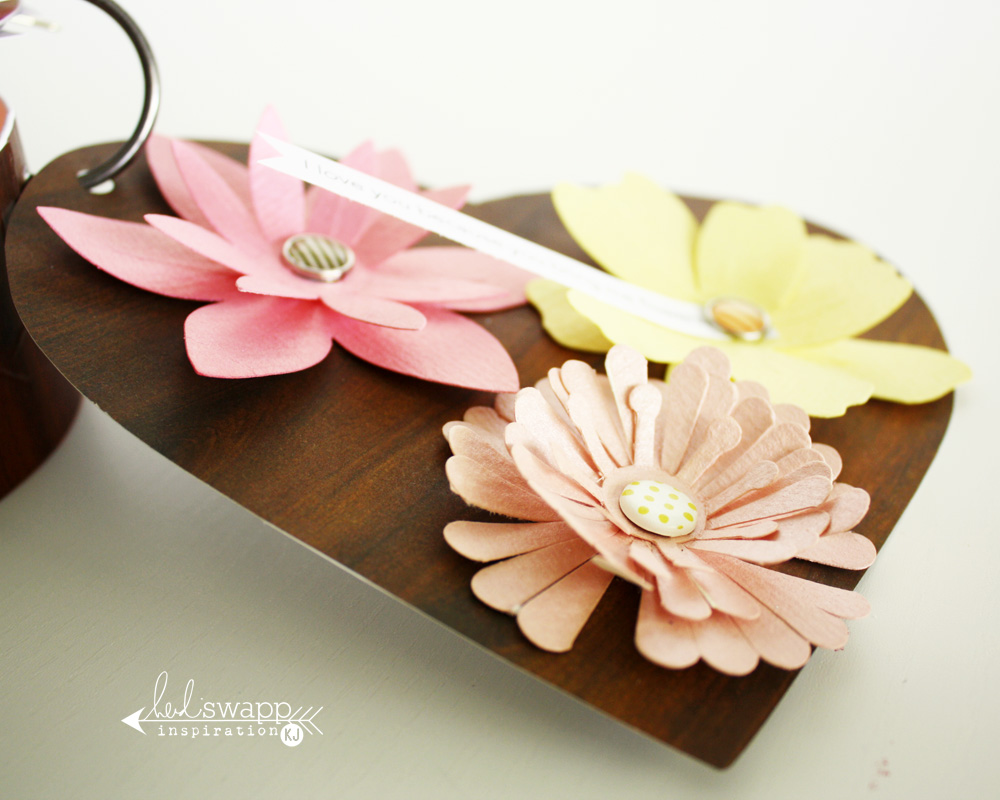
These fun paper flowers come in the collection and they have been sprayed with Pink, Butter and Rose  Colorshine.


Layered together they make a beautiful end page in my album.


I hope my husband loves my album as much as I loved making it!
Photobucket

Monday, December 28, 2015

2016 planner reset

2016 is nearly here! I for one am looking forward to starting the year a fresh...and what better way to do that and be organised at the same time than by using my Heidi Swapp 2016  Gold Polka Dot Memory Planner!
On the 1st of January I am headed to Hawaii for 10 days of bliss and I am planning on taking my Polka Dot Planner to act as a travel journal for this time!

@kimjeffress @heidiswapp #heidiswapp #hsmemoryplanner #planner

In the front cover pockets I have stashed some of the stickers, 2x2 cards and gold clips to hold memorabilia in my planner.

@kimjeffress @heidiswapp #heidiswapp #hsmemoryplanner #planner

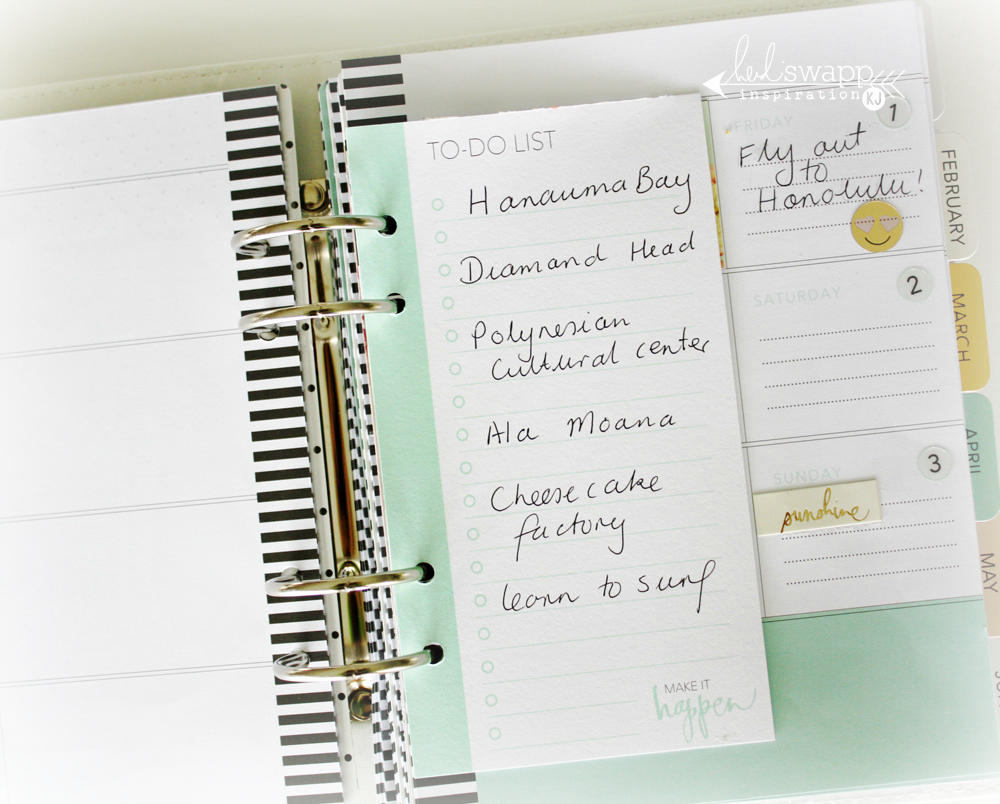
I've made a list of things to do that friends and family have suggested to me on the To Do List pad. I simply ripped a sheet from the pad and placed it into my planner.

@kimjeffress @heidiswapp #heidiswapp #hsmemoryplanner #planner

I added one of the cardboard stickers to the 1st to show the start of my holiday and added those  cute pink glitter stickers over the top for the word Aloha!

@kimjeffress @heidiswapp #heidiswapp #hsmemoryplanner #planner

To hold more memorabilia I used my Planner punch to add holes into the plastic pocket. These are actually self adhesive on the back but I wanted to be able to flip it  over so I added in the holes instead.

@kimjeffress @heidiswapp #heidiswapp #hsmemoryplanner #planner

I love the little bit of glitz it adds!

@kimjeffress @heidiswapp #heidiswapp #hsmemoryplanner #planner

Let me share how I am storing all my planner pieces before I head on my trip. I have a dedicated shelf in my studio that holds my planners, the Planner collection paper pads and all the other bits and pieces of the collection.

@kimjeffress @heidiswapp #heidiswapp #hsmemoryplanner #planner

You can see that Black and white striped 4 inch Storage binder that can be used to hold several months from your planner to make it more manageable.

@kimjeffress @heidiswapp #heidiswapp #hsmemoryplanner #planner
 I have collected a few of my favourite bowls to hold some of the ephemera from the collection, the chipboard frames, tabs, clips and 2x2 cards. They really add a feminine touch to my studio.

@kimjeffress @heidiswapp #heidiswapp #hsmemoryplanner #planner

 To hold all my other packets including the number stickers, letters, puffy stickers and word stickers I found this vintage  toast rack in a local store and filled it with all the bits and pieces. It is so easy for me to flip through and find what I need!

@kimjeffress @heidiswapp #heidiswapp #hsmemoryplanner #planner

How are you planning on keeping track of your memories next year? I would love to hear how!

Photobucket

Tuesday, December 15, 2015

Heidi Swapp 2016 Personal planner

I am excited to share with you today the brand new Heidi Swapp Personal planner for 2016 that is  available now in Australia at Spotlight!
This is one of two gorgeous Heidi Swapp planners that are available and I love how this Personal Planner is compact enough for me to take it in my bag to work!  Yes this planner  is going to be my new work planner and today I am going to share a few ideas and plans I have already made in readiness for the new year!
I adore the gold and white stripe it is just sophisticated and the whole collection to go along with the planner also available at Spotlight is just divine!

@kimjeffress @heidiswapp #hsmemoryplanner #planner #spotlight

I adore the three pockets on the front inside cover where I can store my date and letter stickers plus other little bits and pieces.

@kimjeffress @heidiswapp #hsmemoryplanner #planner #spotlight

What is fabulous about this years Personal Planner is the elastic pen holder on the back cover ! No more scrambling for a pen right! Oh and you can't go past the Planner tabs, here I have stapled one straight onto my page.

@kimjeffress @heidiswapp #hsmemoryplanner #planner #spotlight

The beautiful patterns in the clear Personal Planner Dividers are just to die for! They make it easy to see what week you are up to in a glance!  You can see here I added in some of the Puffy stickers and small glitter stickers to simply embellish my pages.

@kimjeffress @heidiswapp #hsmemoryplanner #planner #spotlight

I think one of my other favourite items in the collection is the To Do List paper pad. You can just rip off a page and add it into your planner as needed!

@kimjeffress @heidiswapp #hsmemoryplanner #planner #spotlight

Being a work planner I don't plan on adding  too many embellishments but I do want it to look pretty so I will definitely be adding in some of the items from the collection including these cute 3x3 cards that I have just clipped onto the page. You can also see the clear number stickers that are so easy to add onto your pages as well.

@kimjeffress @heidiswapp #hsmemoryplanner #planner #spotlight

So even though I have just started my school holidays here in Australia I am already organised for my first week of school when I return from holidays at the end of January!
Don't forget you can grab this Planner plus all these gorgeous pieces from the Planner collection plus more from your local Spotlight right now!
Photobucket

Thursday, December 10, 2015

Oh What Fun Christmas cards

Making Christmas cards has always been a favourite past time around this time, but this year I needed some quick and easy solutions to get my Holiday card making started! Enter the Heidi Swapp Oh What Fun Fun Winter and Oh What Fun Christmas  Project Life value kits!
Being able to use the 3x4 and 4x6 cards from the Project Life kits to form the focal point of my Christmas cards makes it such an easy way to get the card making party started!
For my first card I grabbed one of the 4x6 vellum cards from the Winter kit and used my circle cutter to cut out the laughing all the way sentiment. I then trimmed a slightly larger circle from white cardstock and used my tiny attacher to adhere them together. I then attached the circle with some foam tape to the glitter paper  from the Oh What Fun glitter paper pad! To complete I adhered a bow using ribbon from the Oh What Fun collection.


For my next card I started with that gorgeous JOY 4x6 clear card from the Christmas core kit.
I trimmed a piece of white cardstock to the same size and used a tiny gold clip to hold them together. I then used the December die and some of the gold cardstock from the glitter paper  set to die cut the December word. I adhered the word over the top of the clear card and then tied some thin ribbon to complete.


For my third card I used one of the clear Acrylic 3x4 cards from the Christmas core kit with that gorgeous gold reindeer. I cut the card to fit on top of one of the 4 x4 Minc Christmas cards that I foiled with some Gold foil! I then simply layered pattern paper from the Oh What Fun 6x6 paper pad under the card!


To finish off I added one of Heidi's bows from the Sticker collection to my deer! The perfect finishing touch!


These cards took me just a few minutes to make, I hope I have inspired you to get those Christmas cards made!
Photobucket