
I began with one of the chipboard pieces from the Gold Foil kit and hot glued it to the cover then added a mini frame I found at Michaels when I visited there earlier this year!


To add my ribbon, I adhered one of the 4×6 cards from the Favorite Things Core kit (that I trimmed slightly) to the front and back covers and adhered my ribbon underneath. I added some fun stamping to complete! I also punched some holes in that glitter 3×4 card and added it straight into my album as an opening page

Here I stapled one of the Dreamy Ephemera pieces directly to my photo with my tiny attacher!

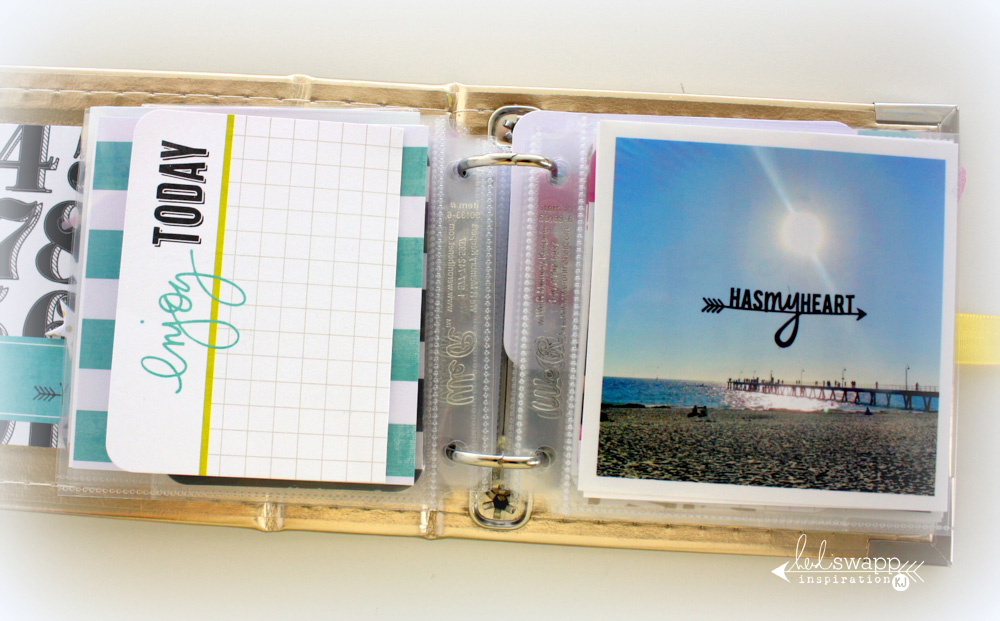
I wanted to show the cities we visited so I goggled an Australian map and lucky for me I found a yellow one! Once it was printed off I added some stamping from the Hello Today Mini stamps. Opposite I popped that 3×4 card into one of the 3×4 plastic pockets from the Make Pretty Stuff collection and embellished it quickly with the PL clear stamp set.

Another 4×6 Favorite Things card I trimmed to 4×4. I also punched holes in one of the cards from the Clear Value kit as an overlay for my next set of photos.

Here you can see the Overlay and also see how I used scraps of pattern paper to pop into the tiny pockets. That yellow butterfly comes from the Make Pretty Stuff Ephemera pack!

Adding clear pieces to photos makes for quick and easy embellishments.

It was fun for my sister to come along to one shop visit.

Here I added a clear flip pocket to the 4×4 pocket to add extra space adding in some QR codes as well. More stamping for quick embellishments and that photo is matted on one of the 4×6
Dreamy Core kit cards that I trimmed down.

For my cute shaker pocket I started with one of the frames from the Clear Value kit. I carefully sliced down the centre of the chipboard frame so I was left with two frames-one with the clear window and one without. Using some scrap clear sheet I adhered it to the windowless frame then sandwiched the two sides back together, slipping some sequins inside. Once the glue was dry I popped it into the 3×4 pocket and added it to my album.

One simple stamp from the PL clear stamps is all that this photo needed.
Inside the scored 4×6 card I added my journaling.

Sheer stickers add some subtle texture.

Time to finally use that ‘fabulous’ Color Pop sticker I have been hoarding! I added it straight onto the plastic pocket.

Another Clear 3×4 card to add an extra element.

I couldn’t help but use that light bulb stamp from the September Skies Clear stamp set, it fitted my photo perfectly. I stapled on a chipboard piece from the Clear Value piece to complete.

I couldn’t help but use that light bulb stamp from the September Skies Clear stamp set, it fitted my photo perfectly. I stapled on a chipboard piece from the Clear Value piece to complete.

This photo is embellished simply with that pretty glitter banner from the Glitter Value kit.

I slipped the mini file folder into the pocket, adhering the back of it to the card, while the front flap sits outside of the pocket.

I added my journaling inside the File folder.

Glitter chipboard pieces adhered to the photo!

Pretty stamps from September Skies!

To my Dreamy 3×4 card I added some sheer stickers and Chipboard shapes from the Clear Value kit. You can see I embossed the card with the 3×4 Star embossing folder to add some texture.

The card lifts up to reveal the photo and journaling hidden underneath.

On the left I trimmed down one of the Glitter 4×6 cards to 4×4 and added my journaling to it. On the right I used another Glitter card and added a strip of the September Skies Washi tape to draw attention to the amazing view in the photo.

More fun stamping!

Hello Today Glitter stickers and Clear ephemera add a touch of elegance to my pockets.

I added my journaling directly onto the Dreamy 3×4 card, that card is one of my favourites!

Here I added one of the Clear Make Pretty Stuff words directly into my pocket.

To complete my album I added my journaling onto the Favorite Things card and adhered it to the pattern paper I had trimmed to size.

Thanks for popping by!

8 comments:
Now that was an action packed trip!!! Loved how you scrapped it, & especially the way you did the typed journaling....fabulous memories all neatly packaged together, right??!!!
You always put so much thought into your little albums, and this one is exceptional! All the limit nooks and crannys and lift up flaps and pretty embellies and an elegant golden cover , love this!
You are incredible Kim!!! You have an unmatched talent for preserving every little detail in such a beautifully presented way. x
This is awesome! I really like everything you've done. You are aces at the little albums!
Love your album Kim, and the pop of Yellow on the front cover is really awesome!!
This is an epic album, Kim. Really love how you told this story. ~j
Oh my goodness Kim - what an amazing project! So much detail and gorgeous colour. Yum!
You are definitely the queen of beautiful memory keeping, adore this mini album so much, jam packed with gorgeousness 👏👏
Post a Comment