Monday, August 29, 2016

Heidi Swapp Halloween classroom fun!

I have been having some fun in my kindergarten classroom with some of the new Heidi Swapp Halloween Celebration in lights collection.

Heidi Swapp halloween

 We have been learning about things that are spooky so the new  Halloween icons for the lightbox were perfect.

Heidi Swapp halloween

I had my students practising their drawing skills by copying the icons. They thought it was so much fun.

Heidi Swapp halloween

Next I used the Luminary sheets on our class light table. 

Heidi Swapp halloween

 I laminated the sheets first to add a touch of stability to them and then laid them on the light table.

Heidi Swapp halloween

My students had fun creating funny spooky faces with bits and pieces from our craft table.

Heidi Swapp halloween

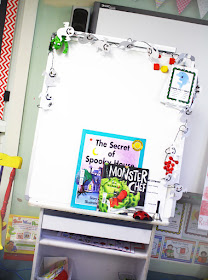
I attached the Ghost Garland around my whiteboard easel for a bit of fun as well! 
All these yummy halloween goodies can be found exclusive to Michaels now!


Photobucket

Tuesday, August 23, 2016

Heidi Swapp Time Capsule album

Have you seen the brand new Heidi Swapp Time Capsule albums part of the Memory Keeping collection  available exclusive to Michaels stores!  They are the perfect way to celebrate and keep someones special memories safe and sound. I have created a special keepsake Time Capsule for my youngest son.

@kimjeffress for @heidiswapp time capsule

There are two time capsule albums, this one has the beautiful linen cover with mint binding.

@kimjeffress for @heidiswapp time capsule

I used the Star gazing Art screen and black Art screen ink available from the Gallery Wall collection on the cover of my album then added some letter beads from my stash threaded on some yellow thread to add my sons name.

@kimjeffress for @heidiswapp time capsule

Inside the album there are 8 envelopes bound together to form the pages.

@kimjeffress for @heidiswapp time capsule

 To decorate the outside of my Time Capsule album envelopes I have used the brand new Memory Keeping Time Capsule kit  also available from Michaels.

@kimjeffress for @heidiswapp time capsule

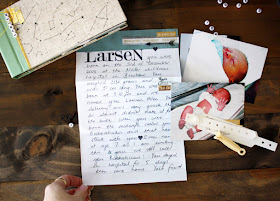
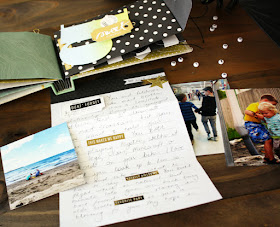
In the first envelope I have placed his new born photos, hospital band and clip.

@kimjeffress for @heidiswapp time capsule

I have also written a special letter to him, sharing the story of his birth on the note paper that comes inside the envelope.

@kimjeffress for @heidiswapp time capsule

I added some of the washi  tape, stamps and gold stickers from the Memory Keeping kit to embellish my letter.

@kimjeffress for @heidiswapp time capsule

In each envelope I added some of the significant events of his life so far.

@kimjeffress for @heidiswapp time capsule

His first set of stitches...

@kimjeffress for @heidiswapp time capsule

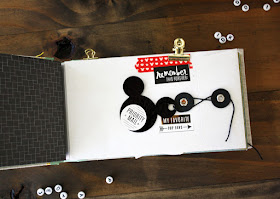
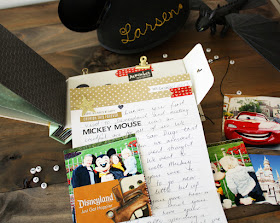
and his first visit to Disneyland!

@kimjeffress for @heidiswapp time capsule

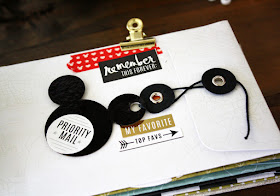
To hold closed my envelope I added a chipboard Mickey Mouse head which I foiled with black foil.

@kimjeffress for @heidiswapp time capsule

I added some of the stickers from the embellishments kit to finish off the front.

@kimjeffress for @heidiswapp time capsule

Inside the envelope  I have stored some favourite photos , tickets and a letter about our time there.

@kimjeffress for @heidiswapp time capsule

I wasn't afraid to use my handwriting on the letters to show my own personality.

@kimjeffress for @heidiswapp time capsule

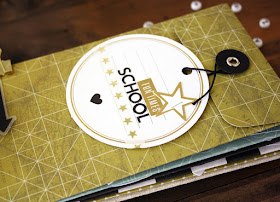
Next I shared memories from his first year at school.

@kimjeffress for @heidiswapp time capsule

To hold closed the envelope I looped the cord into one of the tags from the embellishment kit which I simply decorated with some of the washi, glitter letters and stickers.

@kimjeffress for @heidiswapp time capsule

Inside I added his first day and last day of school photos plus some important details about his first year.

@kimjeffress for @heidiswapp time capsule

My next envelope holds another important step in his life.

@kimjeffress for @heidiswapp time capsule

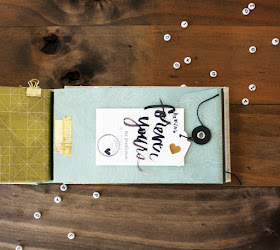
The envelope is held together with a tag and clear word from the embellishment kit.

@kimjeffress for @heidiswapp time capsule

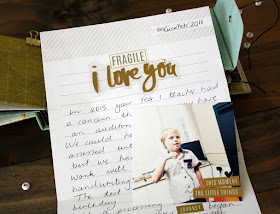
Inside I added some personal journalling and added some of the gold stickers to the photo.


@kimjeffress for @heidiswapp time capsule

I kept the letter simple with that clear acrylic word I attached with my tiny attacher.

@kimjeffress for @heidiswapp time capsule

I added a pocket to celebrate the relationship between he and my elder son.

@kimjeffress for @heidiswapp time capsule

I used one of the large watercolor letters plus two colours of Colorshine to create an ombre effect. I punched a hole on the top then stapled another of the elements  from the kit to form the closure for the envelope. 

@kimjeffress for @heidiswapp time capsule

Inside I tucked special photos and a letter to him about the relationship they have with each other.

@kimjeffress for @heidiswapp time capsule

 I added some stamps from the kit to one of the tags from the embellishment kit and stapled it to the top of the letter.

@kimjeffress for @heidiswapp time capsule

My final envelope holds messages from him.

@kimjeffress for @heidiswapp time capsule

I added another tag and layered on stickers and acrylic words to decorate it.

@kimjeffress for @heidiswapp time capsule

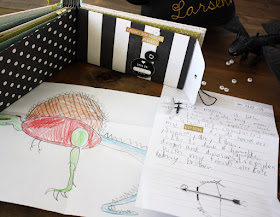
Inside I asked him to draw a picture and write some facts about him right now!
I can't wait to share the album with him when he is older. My plan is to do another one or two over  the next few years to celebrate the next stages in his life too.

Photobucket

Thursday, August 18, 2016

Jot mood board

There is a beautiful new mood board over at Jot magazine.


 I played around with the Heidi Swapp Minc to create my own gold foil lip vellum. It is such an elegant colour combo!


I hope you get a chance to play along!

Photobucket

Tuesday, August 9, 2016

DIY foiled fabric pouch

Sometimes I have crazy ideas when I am crafting and I wonder if I can pull them off. I am excited to say today Im sharing one of those crazy ideas and I love it!  I have used the new Minc Reactive paint and foil to create my own foiled fabric! I then used my fabric to create a couple of zippered pouches!

  kimjeffress for Heidi Swapp Minc Reactive paint #heidiswapp

Let me start with my teal and gold make up pouch.

  kimjeffress for Heidi Swapp Minc Reactive paint #h

I started with some teal cotton fabric that I purchased at my local fabric store. I then used the Minc Reactive paint and and Art Screen  from the Gallery Wall collection and printed onto the fabric. Once dry I ran it through my Minc machine with some gold foil.

  kimjeffress for Heidi Swapp Minc Reactive paint #h

The beautiful gold accents against the teal fabric is just breathtaking! Now I must confess my seamstress skills are not that top notch so I asked a dear friend to help me sew my pouch for me!

  kimjeffress for Heidi Swapp Minc Reactive paint #h

Inside the bag she lined it with this beautiful soft mint satin fabric!

  kimjeffress for Heidi Swapp Minc Reactive paint #h

To finish off my pouch we added in that golden tassel, I think it accentuates it perfectly!

  kimjeffress for Heidi Swapp Minc Reactive paint #h

I have my make up pouch sitting on my dresser at home in my bedroom. It adds an elegant touch to my home decor.

   kimjeffress for Heidi Swapp Minc Reactive paint #h

It makes me smile every time I put my make up on each morning! Next I used some natural cotton fabric , the same Art Screen and some pink foil to make myself a beautiful pouch.

  kimjeffress for Heidi Swapp Minc Reactive paint #heidiswapp  

The soft pink foil is so pretty against the natural grain of the fabric.

  kimjeffress for Heidi Swapp Minc Reactive paint #h

Again we added a beautiful golden tassel to the zip to finish off the pouch.

  kimjeffress for Heidi Swapp Minc Reactive paint #h

Inside she lined the pouch with some beautiful cream satin fabric.

  kimjeffress for Heidi Swapp Minc Reactive paint #h

We made this pouch larger than the first so I could add in more personal items.

  kimjeffress for Heidi Swapp Minc Reactive paint #h

 I love how stylish it is!

  kimjeffress for Heidi Swapp Minc Reactive paint #heidiswapp  

and I can't wait to use it and show it off! Let me share a quick tutorial so you can create your own foiled fabric too!

  kimjeffress for Heidi Swapp Minc Reactive paint #heidiswapp
  1. Cut fabric to size. I cut mine to match the size of my zipper!
  2. Gather your Art screen, Minc Reactive Art screen ink and a scrapper.
  3. Spread the Art screen over the fabric and allow to dry.
  4. Choose your favorite Minc foil color and run it through your Minc machine on setting.
My friend used the following tutorial to sew the pouch.

 I cant wait to see what combo of fabric and foil you come up with!

Photobucket
 Save